In Google Sheets, there are multiple ways to adjust the width of columns. In this article I am going to show you how to change the column width to be wider or narrower, and I will also show you how to change the width of specific columns or every column all at once.
To change the column width in Google Sheets, you first need to select the columns you want to modify. Click on the column letter at the top of the sheet to select a single column. To select multiple columns, click and drag your mouse cursor over the column letters, or hold down the “Shift” key and click on multiple column letters.
Once you’ve selected the columns you want to change, you have several methods to change the column width:
Method 1: Click and drag the mouse to change column width
The easiest way to adjust column width in Google Sheets is by using the click and drag method with your mouse.
To adjust column width in Google Sheets, follow these steps:
- Select the columns that you want to adjust the width of.
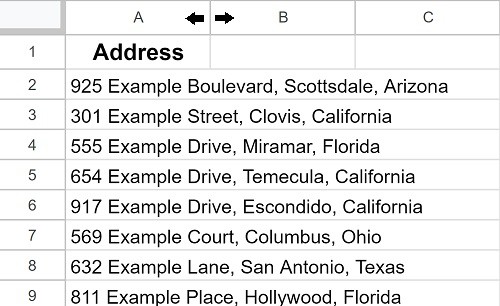
- Place your cursor on the right edge of any selected column until it changes to a double-headed arrow.
- Click and drag the column to the desired width (dragging to the right increases column width, and dragging to the left decreases column width).
- Release the mouse button when the column width is where you want it.
Changing the width of multiple specific columns
If you want you can change the width of a single column, or you can change the width of multiple columns at once by selecting the columns to be adjusted and then changing the width of one of the selected columns.
Change the width of multiple adjacent columns
To select multiple adjacent columns, click on a column, hold the click, drag your cursor left or right to select multiple columns, then release your click when all of the columns that you want to change the width of are selected. Or, you can select a column, hold “Shift’ on the keyboard, then press the left or right arrow key on the keyboard to select multiple columns.
Then click and drag the border of one of the selected columns, and all of the selected columns will adjust to the same width.
Change the width of multiple non-adjacent columns
To select multiple non-adjacent columns (columns that are not right next to each other), hold the “Ctrl” key on the keyboard and then click on any column(s) to select all of the columns that you want to change the width of.
Then click and drag the border of one of the selected columns, and all of the selected columns will adjust to the same width.
Changing the width of all columns
To select all columns at once, press “Ctrl” +”A” on the keyboard
Or, you can select column A, then hold “Ctrl” + “Shift” on the keyboard and press the right arrow key
Then click and drag the border of one of the selected columns, and all of the columns will adjust to the same width.
Make columns the same width
To make multiple columns the same width, select all the columns you want to change and follow the steps outlined above. They will all be set to the same width.
Method 2: Set column width in pixels with the “Resize columns” menu
If you want, you can manually set the column width in pixels to get the exact column width that you want. This is helpful when you want to match the exact width of another column.
- Select the columns that you want to change the width of.
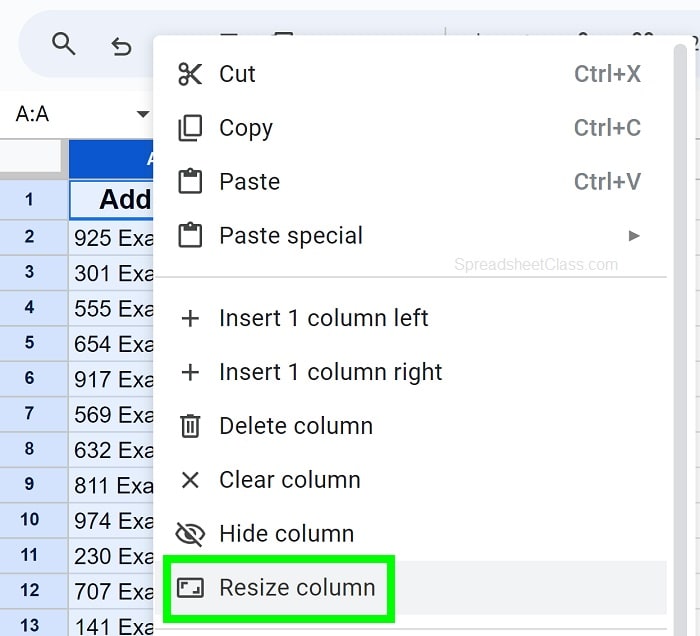
- Right-click on the selected column or one of the selected columns.
- Click “Resize columns.”
- Click “Enter new column width in pixels.”
- Type a value in pixels (The current column width will be displayed in the box).
- Click “OK.”
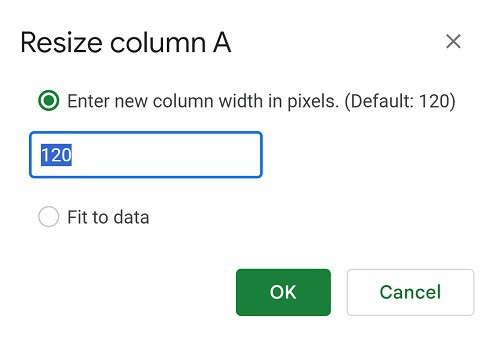
The default width is typically 100 pixels, but you can increase or decrease this value based on your needs.
If you need to check the column width or a certain column to see how many pixels wide it is, you can use the same steps above to view the column width.
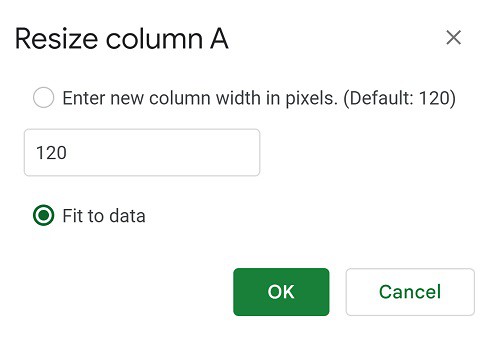
You can also select “Fit to data” to make the column width fit the text automatically, which I will show you how to do later.
Method 3: Use “Fit to data” to automatically change column width to fit text
After you have adjusted the column width of a column, it will remain at that specific width unless you specify otherwise. If you want, you can use autofit / “Fit to data” to make the columns automatically adjust to fit the text inside the cell. The easiest way to autofit column width is by using the double-click method, but I’ll show you another method as well.
To autofit column width in Google Sheets, follow these steps:
- Select the columns that you want to automatically change the width of
- Place your cursor on the right edge of any selected column until it changes to a double-headed arrow
- Double-click your mouse
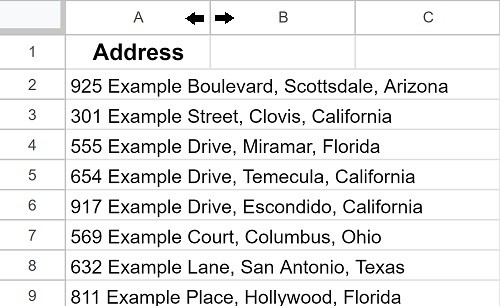
Alternatively you can select the columns to be changed, right-click on one of the selected columns, click “Resize columns”, select “Fit to data”, and then click “OK”
Method 4: Changing column width and wrapping text automatically
If you want, instead of having the column width adjust to a single line of text, you can use text wrapping to make the text go on a new line when it reaches the end of the column, which will cause the column width to automatically adjust for each new line.
If you have text that exceeds the column width, enable text wrapping by following these steps:
- Select the cells that you want to wrap
- Click “Format” on the top toolbar menu
- Click “Wrapping”
- Click “Wrap”
Now you know all the ways to change column width in Google Sheets!
Click here to learn how to change row height in Google Sheets.

