
Have you ever wanted to quickly make the cells in your spreadsheet the same size? Sometimes you may want to change the size of the cells for a certain project, and make sure that all of them are the same size… or sometimes you may just want to clean up the sheet when the cells are not the same size after people adjust the rows and columns.
In this lesson I will show you two ways to make the cells in your spreadsheet the same size, and I’ll also show you how to make the cells perfectly square.
Below I will teach you how to do this in detail.
To make cells the same size in Google Sheets, follow these steps:
- Press Ctrl + A on the keyboard to select all columns and rows, or select the desired columns and rows
- Click and drag the line that separates two column headers at the top of the sheet to adjust the width of the columns (adjusting multiple columns at once will change all selected columns to the same width)
- Click and drag the line between two row numbers on the left side of the sheet to adjust the height of the rows (adjusting multiple rows at once will change all selected rows to the same height)
- Optional: To specify precise cell size, right-click on the selected columns or rows and choose “Resize columns” or “Resize rows.” Enter the desired height or width in pixels
After following the steps above, all of the cells in the selected columns and rows will now be the same size. Further below I will show you how to make cells perfectly square, and how to make cells the same size in specified ranges.
Make all of the cells the same size
Let’s go over an example of making all of the cells in the entire spreadsheet the same size. To do this, first we need to select all of the columns and rows in the spreadsheet. There are two ways to do this.
To select all of the columns and rows in your spreadsheet, you can either press Ctrl + A on the keyboard, or you can click the empty square above row 1 and to the left of column A (shown in the image below).
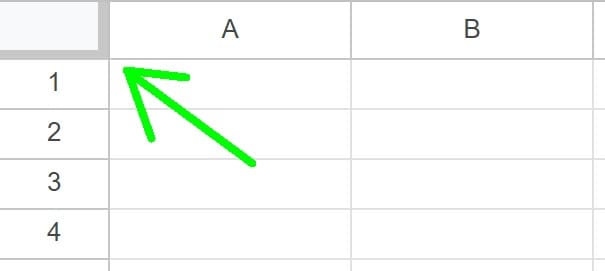
First let’s go over the click and drag method, and then I’ll show you how to set the column width & how to set the row height in pixels if you want to set the exact size of the cells.
To make every cell in the entire spreadsheet the same size, follow these steps:
- Select all rows and columns: Press Ctrl + A on the keyboard or click the empty square at the top left of the spreadsheet (above row 1, to the left of column A)
- Adjust column width: Click on the line that separates two column headers at the top of the sheet, hold the click, and drag your cursor left or right to adjust the width of all the selected columns
- Adjust row height: Click on the line that separates two row numbers on the left side of the sheet, hold the click, and drag your cursor up or down to adjust the height of all the selected rows
In the image below you can see that the cells are all different sizes, because the columns and rows are different sizes.
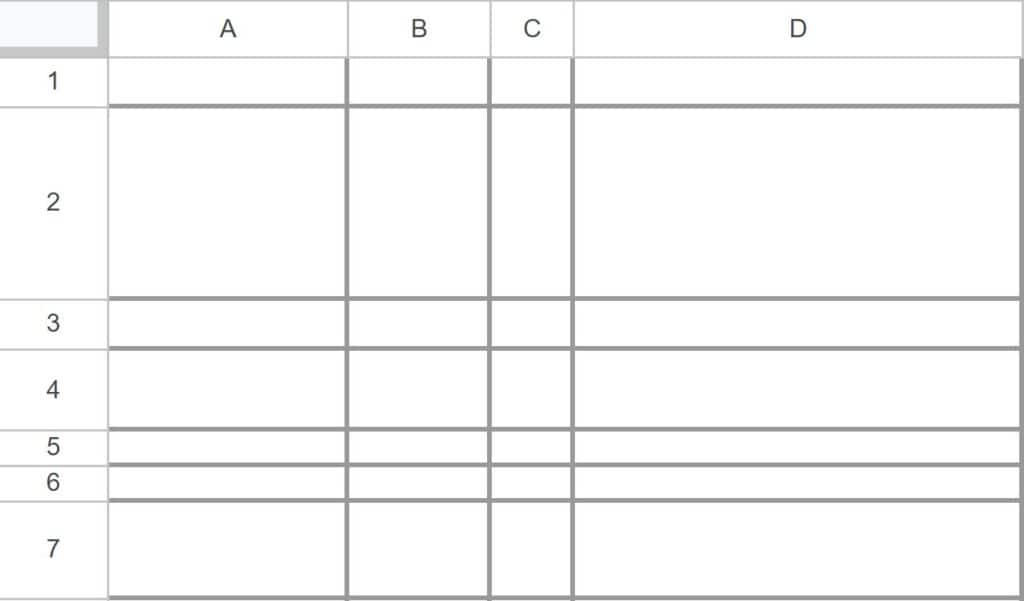
To make all of the cells the same size, press Ctrl + A on the keyboard, to select all of the rows and columns, as shown in the image below (notices that the selected columns and rows are highlighted blue).
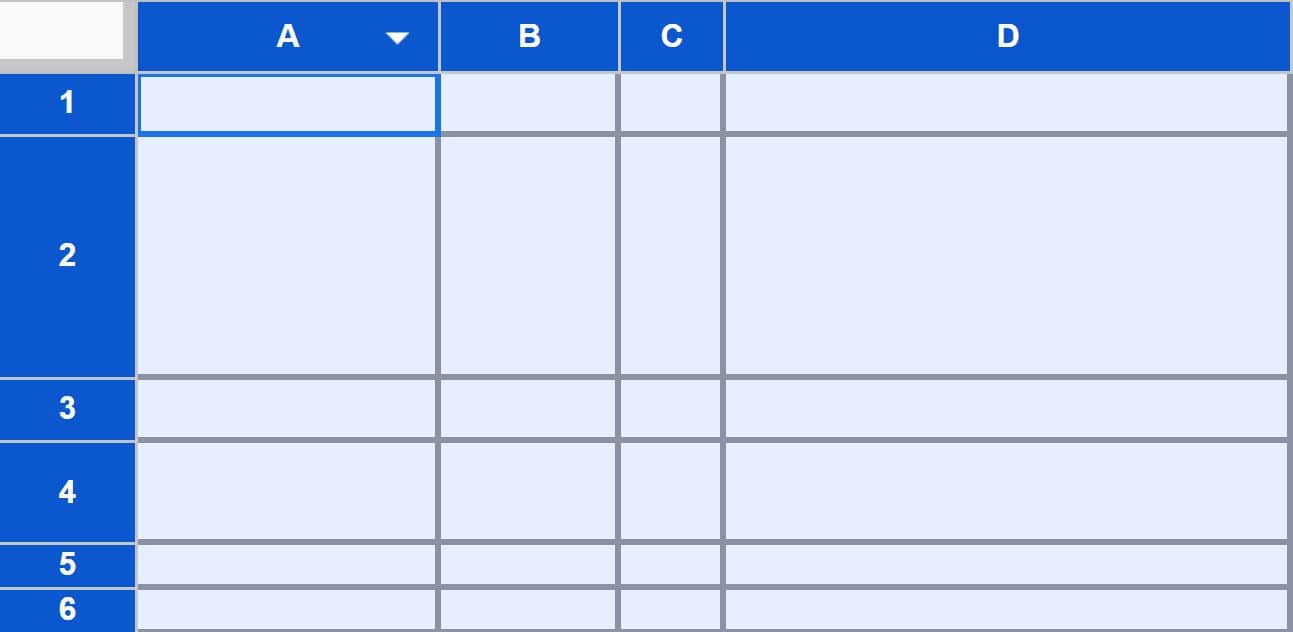
Then we adjust the width of one of the selected columns, and the height of one of the selected rows, and all of the cells in the spreadsheet will now be the same size, as shown in the image below.
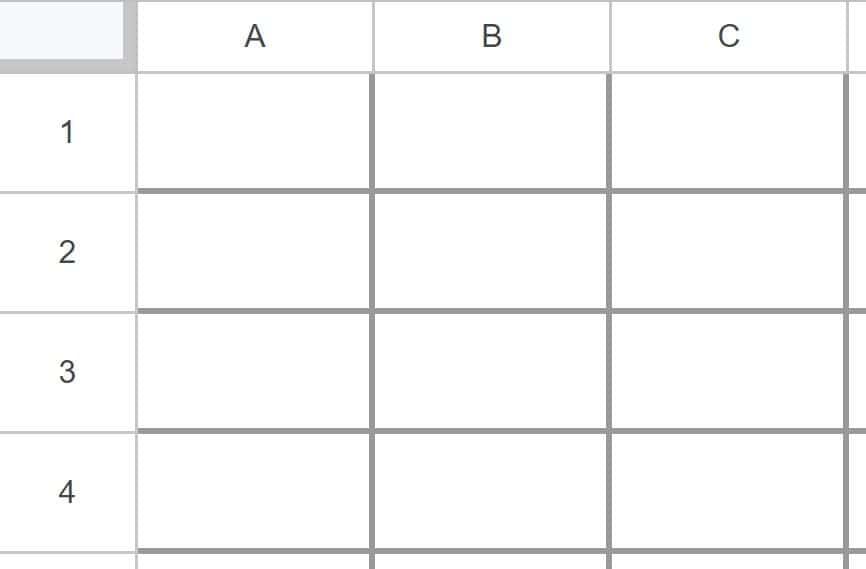
Specifying the exact size in pixels
If you want, you can set the exact column width and row height in pixels, to make cells the exact size that you want. To do this, first select the columns that you want to adjust, right-click on one of the selected columns, and then click “Resize columns”.
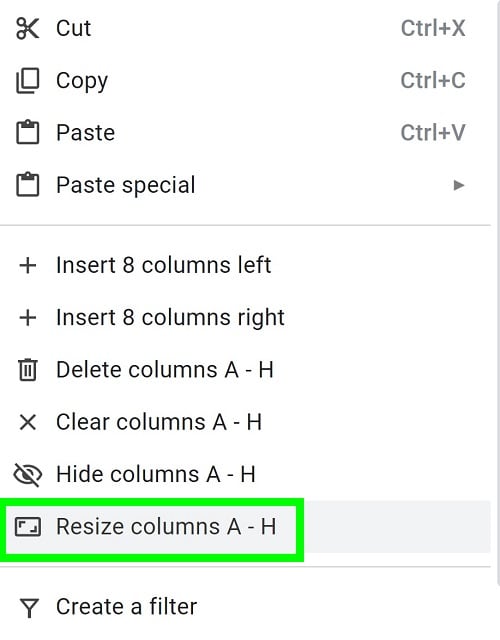
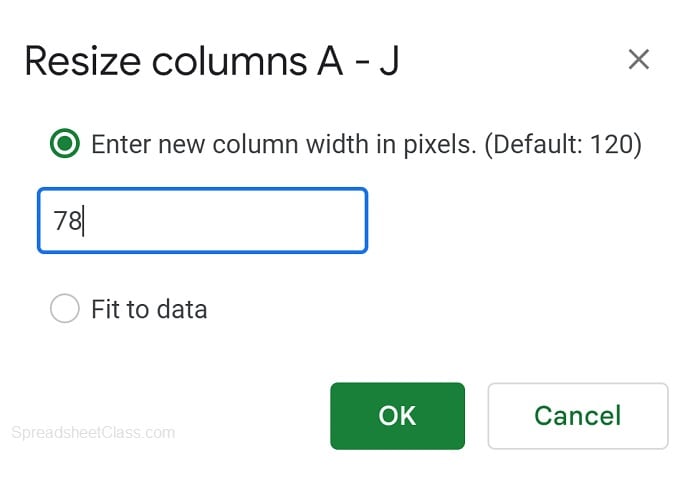
Enter the desired column width in pixels, and then click “OK”.
Now select the rows that you want to adjust, right-click on one of the selected rows, then click “Resize rows”.
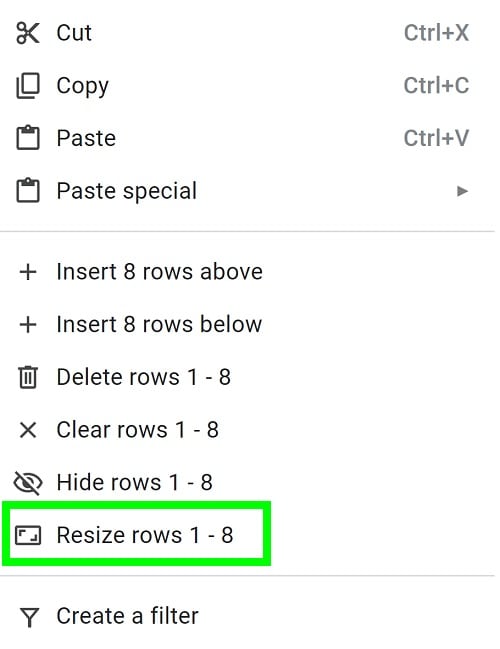
Enter the desired row height in pixels, and then click “OK”.
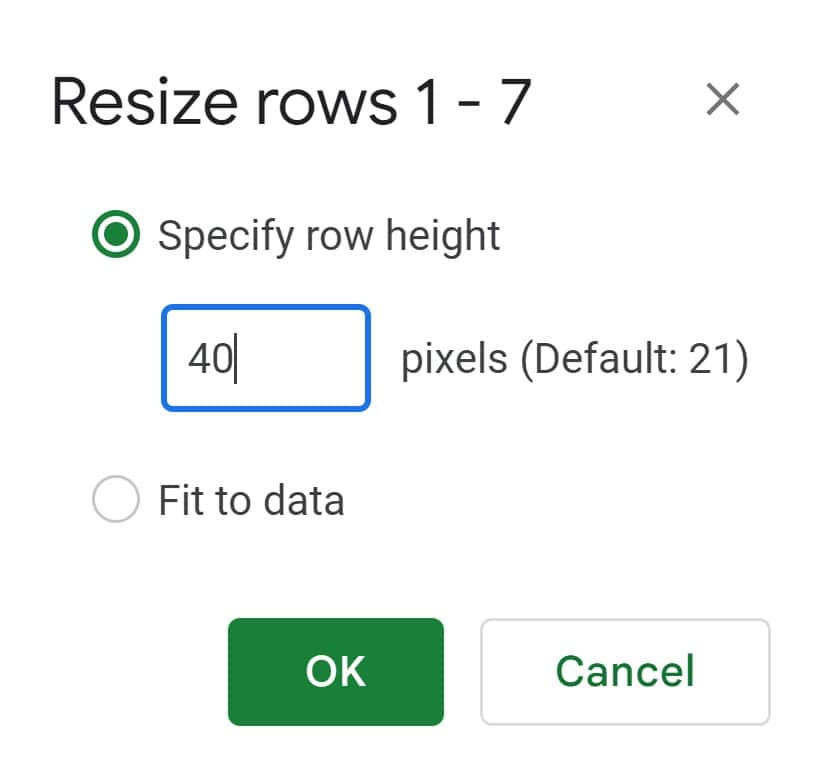
After following these steps: not only will the cells in your spreadsheet be the same size, but they will be the exact size that you want them to be in both dimensions (i.e. height and width).
Make cells square
If you need to make cells perfectly square, you can make the width and height of the cells exactly the same by setting the width / height in pixels. Simply make sure that the row height and the column width are the same value in pixels.
To make cells square in Google Sheets, follow these steps:
- Select the columns / rows that contain the cells you want to make square
- Right-click on the selected columns and choose “Resize columns”
- Enter the desired width in pixels
- Right-click on the selected rows and choose “Resize rows”
- Enter the desired height in pixels
- Enter the same value for both the column width and row height
After following the steps above, you will have square cells in Google Sheets, which means that the rows and columns have the same dimensions.
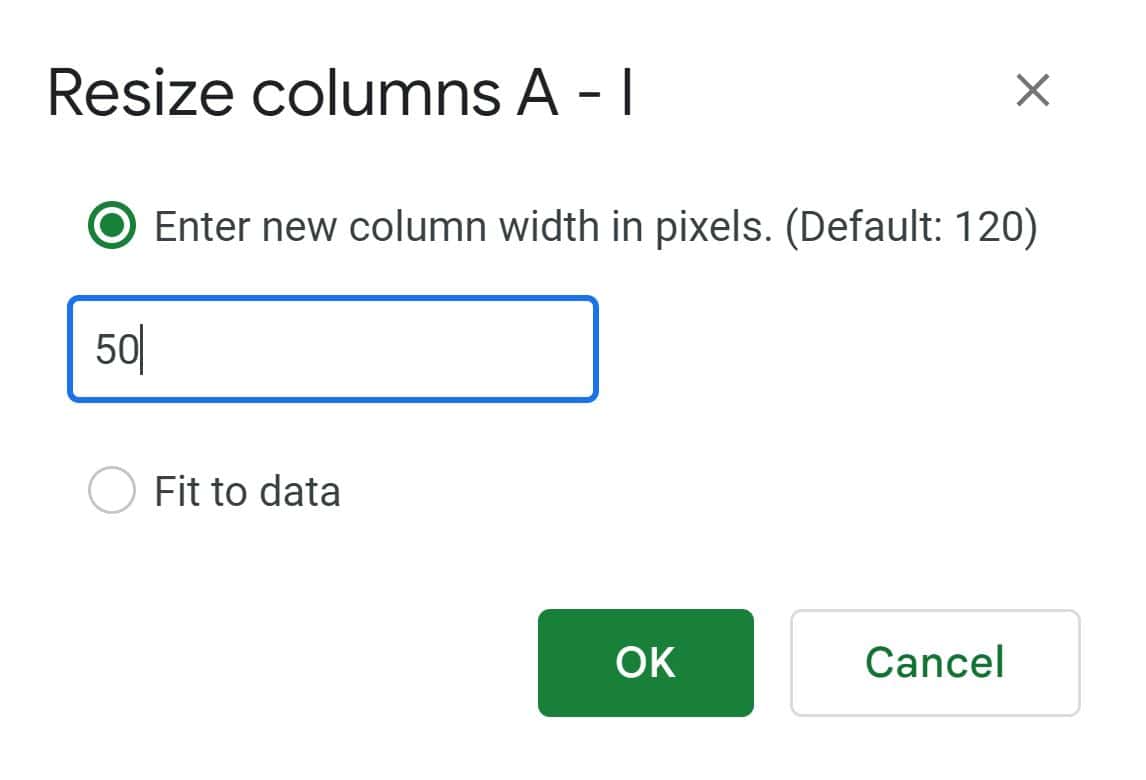
As you can see in the image below, the column width has been set to 50 pixels. Now we will set the row height to the same value to make the cells perfectly square.
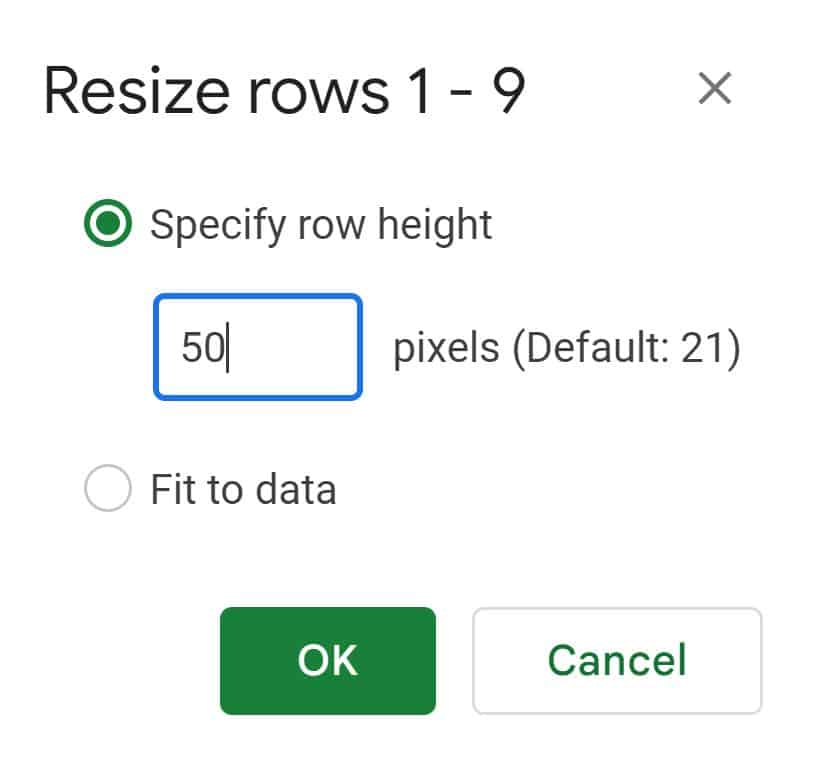
As you can see in the image below, the row height has been set to 50 pixels, which is the same value used for the column width.
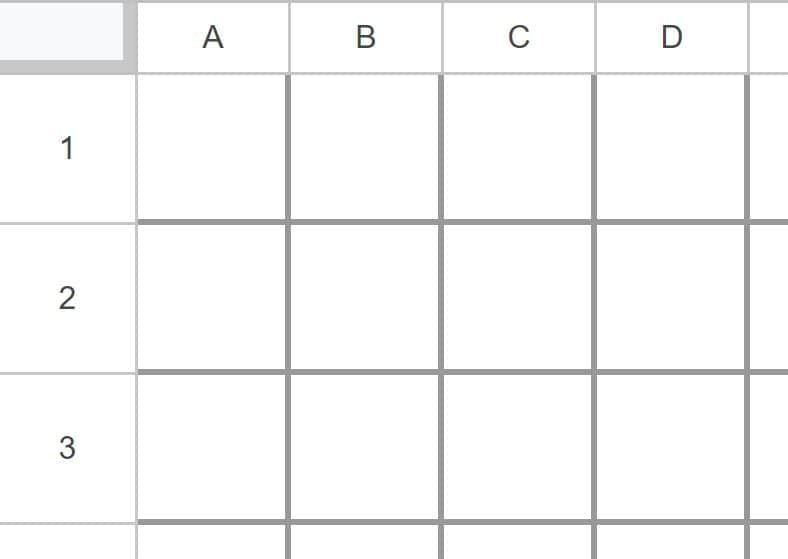
Since the row height and the column width are the same, the cells will be perfectly square, as shown in the image below.
You can use this same method to make big square cells, small square cells, or any size that you want.
When making cells square, you can do this in 3 different ways:
#1 Make column width match row height
You can make the column width match the current row height (which turns cells into small squares with the default row height).
#2 Make row height match column width
You can make the row height match the current column width (which turns cells into big squares with the default column width).
#3 Change both column width and row height to match
You can make square cells any size you want by setting both the column width and the row height to any size that you want.
If you need to check the current row height or column width, right-click on the column or row that you want to check the width / height of, then click “Resize column” or “Resize row”, and you can view the current setting without needing to change the width / height.
Click here to get Google Sheets graph paper with a variety of square sizes.
Making cells the same size in a specific range
If you want, you can adjust the size of cells within a specific range to make the cells the same size in a desired portion of the sheet. To do this, we will select the columns and rows that contain the desired range of cells, rather than selecting all rows and columns.
To be clear, you must select the columns and rows for this to work, and if you only select the cells themselves without selecting entire columns and rows, Google Sheets will not adjust multiple rows / columns at once. So if you want to make the cells in the range A1:F10 the same size, you’ll need to select columns A through F, and rows 1 through 10 (instead of simply selecting the cell range A1:F10).
To select multiple columns in Google Sheets, click on the letter at the top of the first column that you want to select, hold your click, and drag your cursor left or right to select the desired columns.
Then hold “Ctrl” on the keyboard, and select the desired rows by clicking on the number on the left of the first row that you want to select, hold your click, and drag your cursor up or down to select the desired rows.
(Holding “Ctrl” allows you to select a new range / multiple ranges)
To make cells the same size in a specific range, follow these steps:
- Select the columns that contain the desired cells
- Hold “Ctrl” on the keyboard, and select the rows that contain the desired cells
- Adjust the width of one of the selected columns, and all selected columns will adjust to the same width
- Adjust the height of one of the selected rows, and all selected rows will adjust to the same height
After following the steps above, the cells from the range that is within the specified columns and rows will now be the same size.
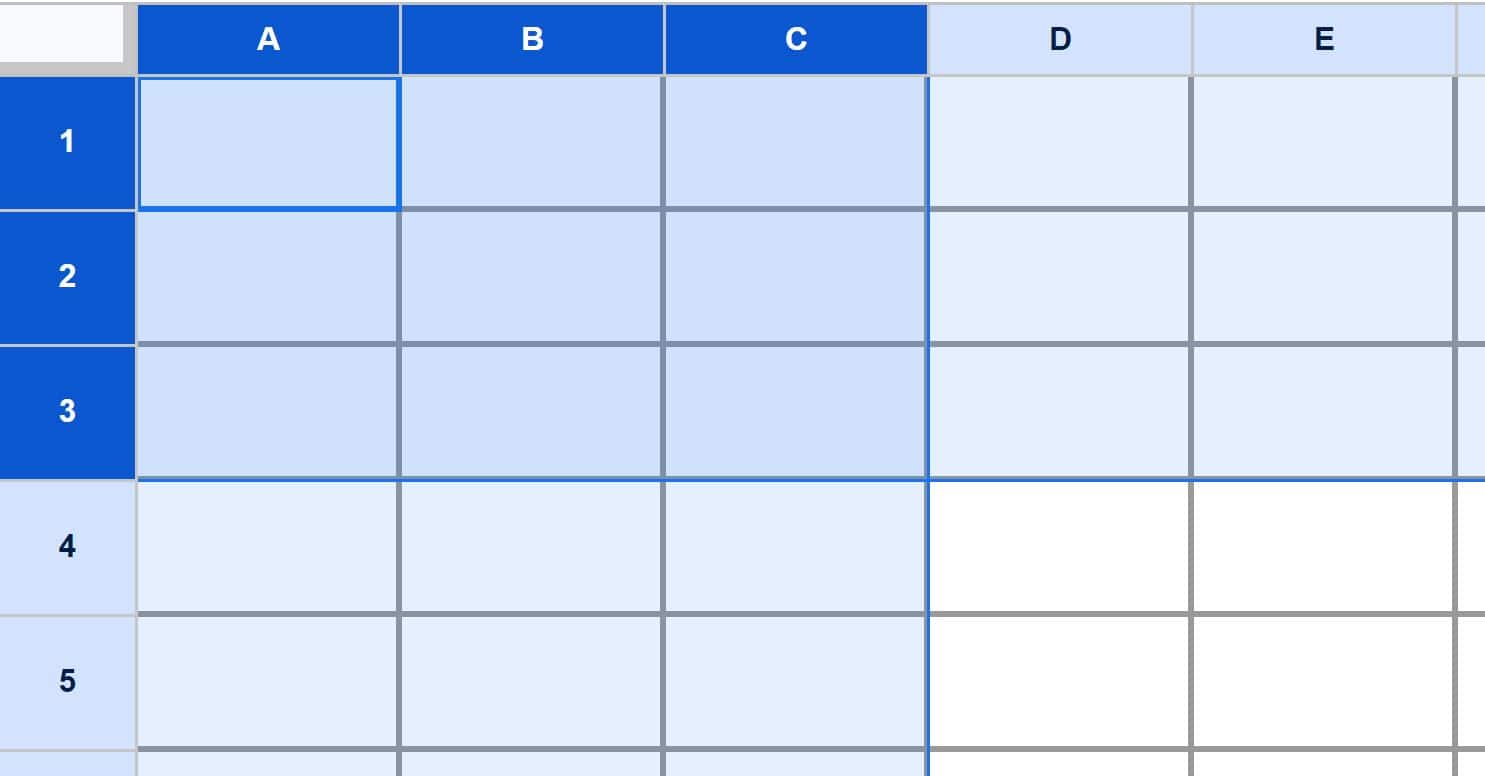
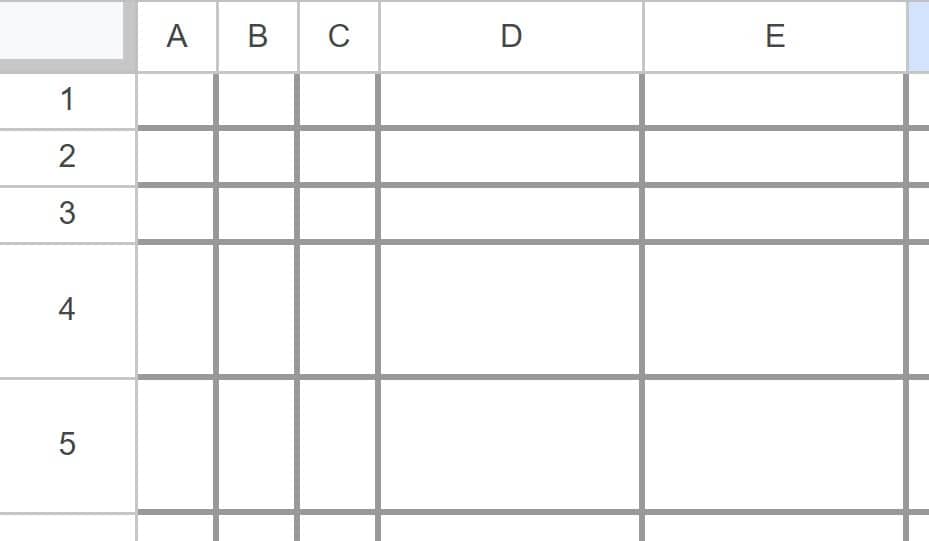
Let’s say that we want to make the cells in the range A1:C3 the same size. To do this, we will need to adjust the width of columns A, B , and C… and we will need to adjust the height of rows 1, 2, and 3.
To do this, select columns A through C, and then hold “Ctrl” on the keyboard to select rows 1 through 3 as well, as shown in the image below.
After adjusting the height of the selected rows and the width of the selected columns, the range A1:C3 now has cells that are the same size, as shown in the image below.
Specify Exact Size: If you require precise cell sizes within the selected range, right-click on the selected columns or rows within that range and choose “Resize columns” or “Resize rows.” A dialog box will appear, allowing you to enter the desired height or width in pixels.
Make cells the same size in a single column / row
If the cells that you want to make the same size are in a single column or a single row, then this makes things easy, because you only need to adjust one dimension to make the cells the same size.
To make cells the same size in a single column, simply make all of the rows the same height: Select all of the rows by clicking on row 1, then press Shift + Ctrl + Down on the keyboard. Then click and drag the border of one of the selected rows to adjust all of the rows to the same height, which will make all of the cells the same size within each single column.
To make cells the same size in a single row, simply make all of the columns the same width: Select all of the columns by clicking on column A, then press Shift + Ctrl + Right on the keyboard. Then click and drag the border of one of the selected columns to adjust all of the columns to the same width, which will make all of the cells the same size within each single row.
Make the cells the same size in non-adjacent columns / rows
If you want to make the cells the same size in columns or rows that are not right next to each other, you can do this by selecting the desired columns / rows that contain the cells that you want to make the same size.
To select multiple non-adjacent columns or rows, hold the “Ctrl” key on the keyboard, and click on the columns letters or row numbers to select the desired columns / rows.
Then click and drag the border of one of the selected columns / rows as described above, and all of the selected columns / rows will adjust to the same size.

